Handler 190 MIG Wire Welder: Setup and Best Use
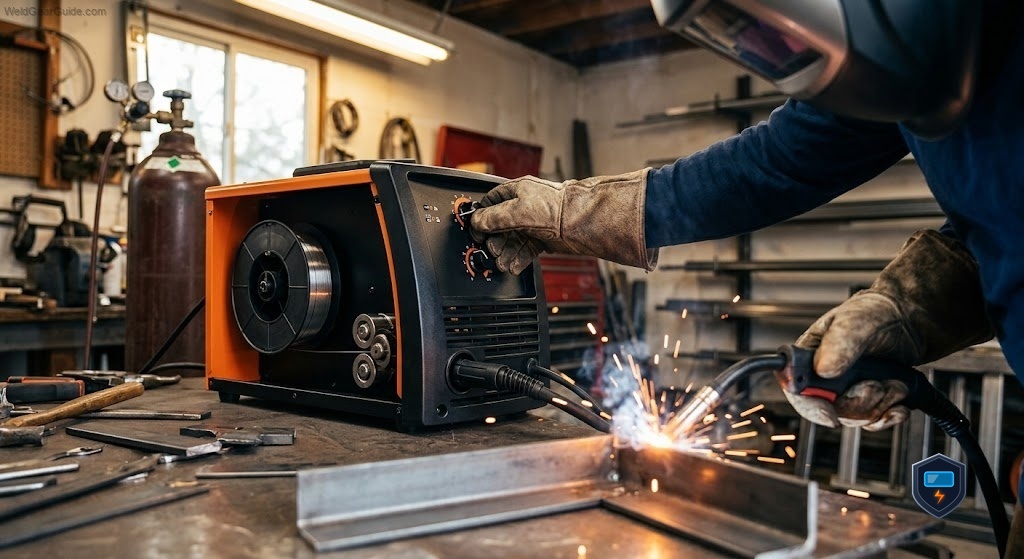
The Hobart Handler 190 is a capable 230-volt wire welder, and getting the most out of it comes down to setting it up correctly and matching it to the right jobs. Plenty of owners bolt on a spool of wire, guess at the settings, and never quite get the clean, strong welds the machine is capable of. That is a shame, because with the right wire, gas, and settings, the Handler 190 rewards you with excellent results across a wide range of steel. A little setup knowledge unlocks its full potential.
This guide focuses on practical setup and use: choosing wire and gas, dialing in settings, and knowing the projects the Handler 190 handles best.
Choosing wire and gas
Setup starts with the two things that most affect your welds: the wire and the gas.
For most steel work, run solid ER70S-6 wire with C25 shielding gas (75 percent argon, 25 percent CO2), the standard combination that gives clean, low-spatter welds on the Handler 190. Choose your wire diameter by metal thickness: .030 inch for general work, .023 for thinner sheet, .035 for thicker plate. For outdoor work or thicker, dirtier metal, switch to self-shielding flux-core wire and no gas, remembering to change the drive rolls and reverse the polarity to electrode negative for flux-core. For aluminum, add a spool gun with aluminum wire and 100 percent argon. Matching wire and gas to the job is the foundation of good results.
Dialing in the settings
The Handler 190 makes setup easier than many machines, so use the help it gives you.
Open the door and use the inside settings chart, which lists the recommended voltage and wire-feed speed for your wire size and metal thickness. Start there, then fine-tune by sound and appearance: a good MIG weld makes a steady sizzle like frying bacon, while too little voltage pops and stubs and too much spatters and sounds harsh. Set your wire stickout to about three-eighths of an inch, and keep the gun at a slight angle, pushing or dragging consistently. If welds look piled up and cold, add voltage or slow travel; if they burn through thin metal, reduce heat or move faster. A few practice beads on scrap of the same thickness dial it in quickly.
The projects it handles best
Knowing the Handler 190’s sweet spot lets you use it where it shines.
With its 230-volt power welding steel up to around five-sixteenths of an inch, the Handler 190 excels at medium-to-heavy home and farm fabrication: trailer frames and repairs, thicker brackets and mounts, gates and fencing, automotive chassis work, and general structural repairs around a shop or property. Its better duty cycle suits longer jobs than a 120-volt machine can handle without frequent cooling. It also handles thinner steel well by stepping down the settings, so it is versatile across a range. Where it stops is heavy industrial plate beyond its single-pass capacity, which calls for a larger machine, and very thin precision sheet, where a lower-powered machine offers finer control.
Getting reliable results
A few habits keep the Handler 190 welding cleanly over its life.
Keep the consumables fresh: replace worn contact tips, clean spatter from the nozzle, and keep the liner clear, since most feeding and arc problems trace to these. Store wire clean and dry so it does not foul the feed. Always weld on clean bare metal with a solid ground clamp connection, since rust, paint, and poor grounding cause more weld problems than the machine ever will. And match your settings to each job rather than leaving one setting for everything. These simple practices, combined with the right wire and gas, are what turn a capable machine into consistently good welds.
What to take away
The Hobart Handler 190 is a capable 230-volt wire welder that delivers excellent results across a wide range of steel when set up correctly and matched to the right jobs.
Three things to remember. Set up with the right wire and gas, typically solid ER70S-6 with C25 for clean steel welds, or flux-core with reversed polarity for outdoor and thicker work. Dial in settings using the inside-door chart, then fine-tune by the bacon-sizzle sound and bead appearance, with proper stickout and gun angle. And use it in its sweet spot of medium-to-heavy home and farm fabrication up to about five-sixteenths of an inch, keeping consumables fresh and metal clean for reliable results.
Frequently asked questions
What wire and gas should I use in a Hobart Handler 190? For most steel, solid ER70S-6 wire with C25 gas (75 percent argon, 25 percent CO2) gives clean, low-spatter welds. For outdoor or thicker work, use self-shielding flux-core wire with no gas.
How do I set the Handler 190 for my metal? Use the settings chart inside the door for your wire size and metal thickness, then fine-tune by sound and bead appearance. A good weld sizzles steadily like frying bacon.
How thick can the Handler 190 weld? Steel up to around five-sixteenths of an inch in a single pass on its 230-volt power, and thicker with multiple passes, excelling at medium-to-heavy home and farm fabrication.
Do I need to change anything to run flux-core in the Handler 190? Yes. Switch to the correct drive rolls for flux-core wire, remove the gas, and reverse the polarity to electrode negative, which the manual and inside-door guide explain.
Can the Handler 190 weld aluminum? Yes, with a compatible spool gun, aluminum wire, and 100 percent argon gas. On its own it welds steel with solid wire and gas or self-shielding flux-core.
Why are my Handler 190 welds inconsistent? Usually worn consumables, dirty metal, or a poor ground. Replace the contact tip, clean the nozzle and metal, and clamp to clean bare steel before blaming the settings or machine.
What projects is the Handler 190 best for? Medium-to-heavy home and farm work: trailer frames, thicker brackets, gates, fencing, automotive chassis, and structural repairs, plus thinner steel by stepping the settings down.
References
- American Welding Society, AWS
- Occupational Safety and Health Administration, Welding, Cutting, and Brazing
- National Institute for Occupational Safety and Health, Welding Safety
- Miller Electric, MIG Welders