MIG Wire Speed and Voltage Chart: Dial In Your Settings
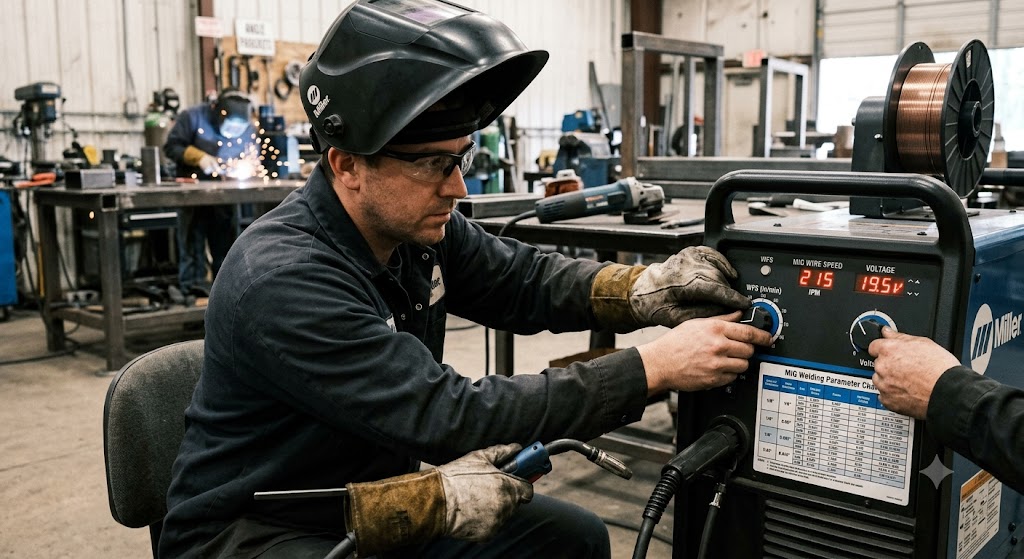
Two knobs stand between you and a good MIG weld: wire speed and voltage. Set them right and the arc makes that steady bacon-sizzle everyone talks about. Set them wrong and you get a stuttering, spattering mess, or wire that piles into a bird’s nest at the gun before you even touch the metal. A chart gets you close, and knowing what each knob actually does gets you the rest of the way.
A MIG wire speed and voltage chart matches your material thickness and wire size to a starting wire feed speed (in inches per minute) and voltage. The core rule is simple: set amperage from thickness (about 1 amp per .001 inch of steel), which you control with wire feed speed, then adjust voltage to shape the bead. Here is how to read the chart and tune from there.
What each setting actually controls
Before the numbers, understand the two knobs, because charts make far more sense once you do:
- Wire feed speed controls amperage (heat and penetration). Faster wire equals more current and deeper penetration. This is the setting you dial in first.
- Voltage controls the bead shape and arc. More voltage flattens and widens the bead; too little gives a tall, ropey bead, too much gives a flat, spattery one with possible undercut.
So the pro sequence is: set wire feed speed for the amperage your thickness needs, then adjust voltage until the arc smooths out and the bead looks right.
The amperage rule that starts everything
Everything begins with how much current your metal needs, and there is a clean rule of thumb for steel: about 1 amp per .001 inch of thickness. That gives you:
- 1/8 inch steel (.125 inch): about 125 amps.
- 3/16 inch steel: about 180 amps.
- 1/4 inch steel: about 250 amps.
Adjust for metal: stainless needs roughly 10 to 15 percent less current, and aluminum needs about 25 percent more. This rule holds well up to about 1/4 inch, after which thick metal usually needs multiple passes rather than simply more heat.
Wire size and amperage chart
Your wire diameter has to suit the amperage you are running. These are standard ranges:
| Wire diameter | Amperage range | Typical steel thickness |
|---|---|---|
| .023 inch | 30 to 130 amps | 24 gauge to 1/8 inch |
| .030 inch | 40 to 145 amps | 20 gauge to 1/4 inch |
| .035 inch | 50 to 180 amps | 14 gauge to 1/4 inch and up |
| .045 inch | 75 to 250 amps | 1/8 inch and thicker |
Once you know your amperage target and wire size, you can set wire feed speed. A common starting point for .030 inch wire is about 2 inches per minute of wire feed per amp, so 125 amps points to roughly 250 ipm as a starting number to fine-tune.
How to tune from the chart
Charts are a starting point, not a final answer, because every machine, joint, and gas mix differs. Tune by feel and sound:
- Set wire feed speed for your thickness and wire size (using the amperage rule).
- Set voltage to the chart setting, then listen. A steady, smooth sizzle means you are close.
- If the bead is tall and ropey with a harsh arc, raise the voltage a little.
- If the bead is flat and spattery with undercut, lower the voltage.
- If penetration is weak, raise wire feed speed (amperage); if you are burning through, lower it.
Always test on scrap of the same thickness before welding the real joint.
Why your wire keeps birdnesting
A quick word on the most common MIG frustration, because it is usually a mechanical issue, not a settings one. Wire piling into a bird’s nest at the drive rolls comes from feeding resistance: a worn or wrong-size contact tip, a clogged or kinked liner, too much or too little drive roll tension, or a tip diameter that does not match the wire. Check that your contact tip matches the wire size exactly, keep the liner clean, and set drive roll tension just firm enough to feed without crushing the wire.
Which MIG wire to run
Dialing in settings is easier with quality wire that feeds consistently.
- INEFIL ER70S-6 MIG wire (.030 inch, 10 lb spool) is a smooth-feeding everyday choice for thin to medium steel, which makes your speed and voltage settings behave predictably. Its limitation is that very thick steel is better served by a larger diameter.
- PGN ER70S-6 MIG wire (.035 inch, 10 lb spool) steps up for heavier work at higher amperage, carrying more current for thicker joints. The trade-off is easier burn-through on very thin sheet than a smaller diameter.
How to choose: match the wire size to your amperage range from the chart. Use .030 inch for general home work up to about 1/4 inch, and .035 inch when you regularly weld thicker steel. Match your contact tip to the wire diameter to keep feeding smooth.
The bottom line
A MIG wire speed and voltage chart gets you close, but the logic is what makes you good: set wire feed speed for the amperage your thickness needs (about 1 amp per .001 inch of steel), then adjust voltage to shape the bead. Adjust for stainless and aluminum, tune by sound on scrap, and fix birdnesting at the drive rolls rather than the knobs. Learn the two knobs and you can dial in any machine.
FAQ
What wire speed should I use for 1/8 inch steel? Start from the amperage: 1/8 inch (.125 inch) steel needs about 125 amps. With .030 inch wire at roughly 2 ipm per amp, that points to about 250 inches per minute of wire feed speed, then fine-tune by sound on scrap.
How do voltage and wire speed relate on a MIG welder? Wire feed speed controls amperage, which sets heat and penetration, and you set it first. Voltage controls the bead shape and arc smoothness, and you adjust it after. Together they balance for a clean weld.
How many amps do I need for my metal thickness? Use about 1 amp per .001 inch of steel thickness: roughly 125 amps for 1/8 inch, 180 amps for 3/16 inch, and 250 amps for 1/4 inch. Stainless needs 10 to 15 percent less, aluminum about 25 percent more.
Why does my MIG wire keep birdnesting? Birdnesting comes from feeding resistance: a mismatched or worn contact tip, a clogged or kinked liner, or incorrect drive roll tension. Match the tip to the wire size, keep the liner clean, and set tension just firm enough to feed without crushing the wire.
How do I know if my voltage is too high or too low? Too low gives a tall, ropey bead with a harsh, stubby arc. Too high gives a flat, spattery bead that may undercut. Adjust until you hear a steady, smooth sizzle.
What wire size should I use for my amperage? Match wire to amperage: .023 inch for 30 to 130 amps, .030 inch for 40 to 145 amps, .035 inch for 50 to 180 amps, and .045 inch for 75 to 250 amps.
References
- Miller Electric, MIG welding: setting the correct parameters, including the 1 amp per .001 inch rule and wire feed speed multipliers (manufacturer), millerwelds.com.
- Lincoln Electric MIG (GMAW) welding parameter and setup guidance (manufacturer), lincolnelectric.com.
- Forney Industries MIG set-up chart for wire feed speed and voltage by material thickness (manufacturer), forneyind.com.