How to Adjust Welding Helmet Headgear for a Comfortable Fit
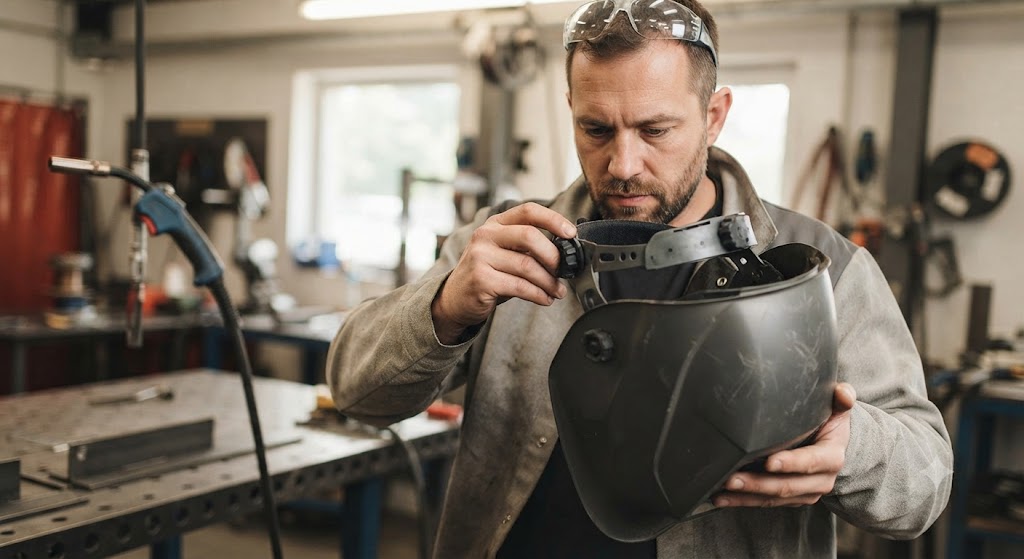
A welding helmet that fits badly tells you about it all day. The weight sits forward on your forehead instead of distributing across your skull. The shell drops when you look down and comes back up when you look level, which means every time you reposition your work your view shifts with it. By the end of a four-hour session your neck is sore and your forehead has a red mark where the band has been pressing.
None of that is a helmet problem. It is a headgear adjustment problem, and most welding helmet headgear has enough adjustment points to get a comfortable, stable fit on almost any head shape if you know where to start.
The components of welding helmet headgear
Most modern auto-darkening helmets use a four-point suspension headgear with the following adjustable elements:
- Crown straps. The straps that cross over the top of the head and distribute the helmet weight. Usually two, crossing in an X or a single crown strap.
- Circumference adjustment. The ratchet knob at the back of the head that tightens or loosens the headband to fit the head circumference.
- Tilt adjustment. Controls the angle of the shell relative to your face, determining how far the lens sits from your nose and at what angle you view through it.
- Height adjustment. On some headgear designs, the pivot arms that connect the shell to the headgear can be raised or lowered to position the lens at the right height in front of your face.
- Sweatband. The foam or fabric inner band that contacts the forehead. Not typically adjustable in position but replaceable when it wears.
Step-by-step: how to adjust the headgear correctly
Step 1: Set the circumference first
Loosen the ratchet knob completely, put the helmet on, and tighten the ratchet until the headband sits snugly around your head with even contact front and back. The headband should not be loose enough to slip, but it should not be pressing hard enough to leave marks.
The ratchet knob is the most used and the most misunderstood control. Welders often set it once and forget it, then wonder why the helmet shifts during use as the headgear settles.
Step 2: Adjust the crown straps
With the helmet on and the circumference set, adjust the crown straps so the weight of the shell is supported evenly across the top of the head and not bearing entirely on the forehead band. The straps should be taut but not pulling the helmet backward or forward.
If the helmet sits nose-heavy and tips forward when you look down, tighten the rear crown strap. If it tips back when you look up, adjust the strap balance toward the front.
Step 3: Set the tilt angle
The tilt adjustment sets the angle of the shell in front of your face. Look through the lens in your normal welding position, not standing straight: adopt the actual posture you use when welding.
The center of the lens should fall naturally in front of your eyes without you needing to tilt your head up or down to see the puddle. If you are looking through the bottom edge of the lens, tilt the shell forward. If you are looking through the top edge, tilt it back.
Most tilt adjustments use a friction joint on the pivot arms, requiring you to hold the shell at the desired angle and tighten the joint. On some helmets like the Miller T94 and similar professional designs, the tilt is set via a dial adjustment that clicks into position.
Step 4: Check the flip-up clearance
Flip the helmet up and make sure it clears the top of your head without hitting the crown straps. The helmet should snap firmly upward and stay in the raised position without drifting back down. If it drifts, the pivot joint tension is too loose: there is usually a tension adjustment screw at the pivot arm connection point.
Step 5: Test the fit under load
Shake your head left, right, and forward. The helmet should stay in position without shifting more than a couple of millimeters. Look straight down at the floor, which simulates looking down at a flat plate joint. The helmet should stay centered over your face and the lens should remain in front of your eyes, not sliding up to your forehead.
If the helmet droops forward when you look down, tighten the circumference, raise the back crown strap tension, or check the pivot tilt angle, which may be allowing forward rotation.
Why poor headgear adjustment causes neck strain
A helmet that sits too far forward on the face places the center of mass ahead of the support point (your skull). Your neck muscles compensate for this cantilever effect continuously. Over a full shift, the muscular effort required to keep your head in position against a forward-biased helmet load adds up to real fatigue and soreness.
The goal of headgear adjustment is to position the helmet so the center of mass sits as close to directly above the crown of your skull as the optics allow. A properly adjusted helmet feels lighter than a poorly adjusted one of identical weight because the load is balanced rather than cantilevered.
Frequently asked questions
How do you stop a welding helmet from sagging when looking down? Tighten the circumference adjustment so the headband holds its position under the weight of the shell. Check that the crown straps are balancing the shell weight evenly. If the tilt adjustment is too far forward, the helmet may rotate forward when you look down: adjust the tilt so the shell is balanced at the angle you use most.
What is the correct way to adjust helmet headgear? Set circumference first, then balance the crown straps, then set the tilt angle in your actual welding posture. Test by looking down at a floor-level workpiece and checking that the lens stays centered on your eyes.
Can poor headgear adjustment cause neck strain? Yes. A helmet that sits too far forward places its weight ahead of the skull’s support point, requiring continuous neck muscle compensation. Proper headgear adjustment distributes the weight over the crown and reduces this load significantly.
What is a four-point suspension headgear? A headgear design with four contact points on the head: forehead front, two sides, and rear. Four-point suspension distributes helmet weight more evenly than simpler two-point designs and is standard on quality auto-darkening helmets.
My helmet fits but still slides down when I look down. What is wrong? The circumference is too loose. Tighten the ratchet knob until the headband has more resistance. Also check the crown strap balance: a strap that is tensioned too far to the front of the helmet encourages the shell to rotate forward when you look down.
How tight should welding helmet headgear be? Snug but not uncomfortable. You should not be able to shake the helmet off your head or rotate it easily, but the band should not be pressing hard enough to cause a headache after an hour of wear. If you need to choose between helmet stability and comfort, adjust the crown straps and tilt angle to balance the load rather than cranking the circumference tighter.
References
- Miller Electric, headgear adjustment and fit documentation for Digital Elite and T94 series
- Lincoln Electric, Viking series headgear adjustment guidelines
- Occupational Safety and Health Administration (OSHA), welding personal protective equipment standards
- American Welding Society (AWS), welding safety practices