How to Clean an Auto Darkening Welding Lens
The puddle looks hazy. You tilt your head and it clears slightly, then blurs again. You chalk it up to arc glare until you take the helmet off and hold the lens up to the light. The cover lens is filmed over with spatter residue, shop dust, and the residue from whatever solvent someone used on the bench last week.
Cleaning an auto-darkening welding lens the wrong way scratches it permanently. The right way takes two minutes and leaves the lens optically clear without touching the ADF underneath.
Understanding what you are cleaning
A modern auto-darkening helmet has two separate lens components:
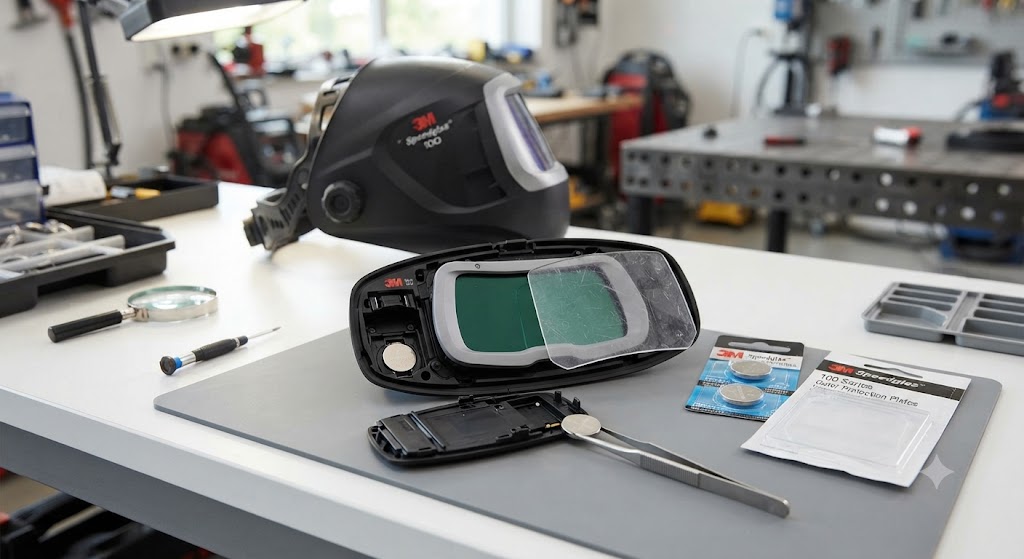
The cover lens is the outer plastic sheet that protects the ADF from physical damage, spatter, and dust. This is almost always what you need to clean, and it is the part that scratches if you wipe it wrong.
The ADF (auto darkening filter) is the electronic lens underneath. It handles the darkening function. If you are cleaning it, you should be extremely careful: the ADF has optical coatings that are easy to damage and impossible to repair.
Start every cleaning session by removing the cover lens. If the ADF underneath is clear, all the haze and contamination was on the cover lens. Clean or replace the cover lens, reinstall it, and you are done. Most lens haze is a cover lens problem.
What you need
- Clean, lint-free microfiber cloth (no paper towels, no shop rags)
- Lens cleaning solution or plain isopropyl alcohol for plastic (optional but helpful)
- Soft brush or compressed air puffer for loose debris
- Replacement cover lenses for your helmet model (keep these on hand)
Step-by-step: cleaning the cover lens
Step 1: Remove the cover lens. On most helmets, the cover lens snaps or slides out from a retention frame around the ADF. Check your helmet’s manual if the method is not obvious. Removing the cover lens protects the ADF from any cleaning product and gives you a flat, separate surface to clean.
Step 2: Blow off loose debris first. Use a can of compressed air, a rubber puffer, or gently breathe on the lens to dislodge loose dust and grit. Wiping a lens that still has grit on it will scratch it. Removing loose particles before any cloth contacts the lens is the single most important step.
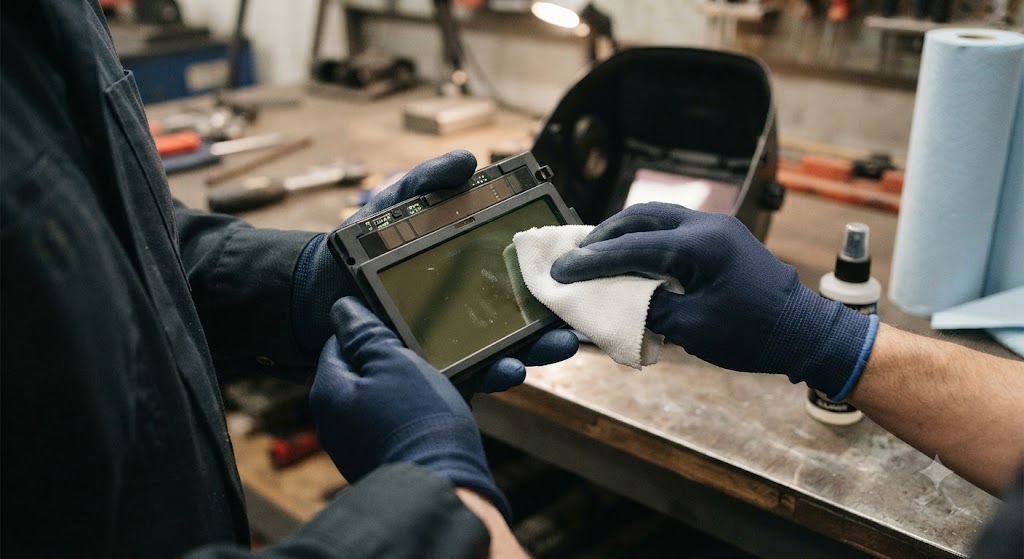
Step 3: Dampen a microfiber cloth. Lightly dampen a corner of a clean microfiber cloth with lens cleaning solution or plain isopropyl alcohol. The cloth should be barely damp, not wet. A wet cloth can push contamination under the lens edge and leave residue behind as it dries.
Step 4: Wipe with light pressure in one direction. Using only the weight of the cloth, wipe across the lens in one direction. Do not scrub, do not use circular motion, and do not press down. One or two passes with fresh cloth surface per pass.
Step 5: Dry with a clean dry microfiber. Follow immediately with the dry side of the cloth or a fresh dry microfiber. Lens cleaning solution and isopropyl alcohol evaporate quickly, but drying the lens manually prevents water spots and residue streaks.
Step 6: Inspect and decide. Hold the cover lens up to a light source. If it is still heavily contaminated after cleaning, replace it. Cover lenses are inexpensive consumables. A clean replacement lens is always a better result than a cleaned-but-hazy one.
Cleaning the ADF
If the ADF itself needs cleaning after the cover lens is removed:
- Use only a clean, dry microfiber cloth or one dampened very lightly with lens cleaning solution.
- Wipe in one direction, no pressure, one pass.
- Do not use glass cleaner, household cleaners, acetone, or any solvent not specified as safe for optical plastic coatings.
- Do not use paper towels, tissues, or shop rags. All of these are coarser than microfiber and will leave micro-scratches on the ADF coatings.
Can you use glass cleaner on a welding lens? Not on the ADF. Standard glass cleaners like Windex contain ammonia, which can damage the optical coatings on the ADF surface. On a plastic cover lens, glass cleaner with ammonia can also cause cloudiness over time. Use a lens-specific cleaner or plain isopropyl alcohol on plastic.
How often should you clean the lens?
The cover lens should be visually inspected before every session and replaced or cleaned whenever contamination affects your view. In a heavy production environment, that may mean replacing the cover lens every day. In a light shop, every few weeks.
The ADF itself needs cleaning far less frequently since the cover lens takes the damage. When you notice haze that persists after replacing the cover lens, the ADF may need attention.
How to avoid scratching the lens while cleaning
The three rules that prevent scratching:
- Remove loose debris before any cloth contacts the lens. Grit caught under a wiping cloth is what causes most cleaning-related scratches.
- Use only microfiber. No paper towels, no shop rags, no tissue.
- Use no pressure. Let the weight of the cloth do the work. Pressing harder does not clean better: it presses whatever is on the cloth into the lens surface.
Frequently asked questions
What is the safest way to clean an auto darkening lens? Remove the cover lens, blow off loose debris with compressed air, wipe gently with a clean damp microfiber cloth in one direction, and dry immediately. Do not use pressure, do not scrub, and do not use glass cleaner or household chemicals on the ADF.
Can you use glass cleaner on a welding lens? Not on the ADF and not recommended on plastic cover lenses either. Standard glass cleaners contain ammonia that can damage optical coatings and cloud plastic over time. Use a dedicated lens cleaning solution or plain isopropyl alcohol.
How do you avoid scratching the lens while cleaning? Blow off all loose debris before touching the lens. Use only a clean microfiber cloth with light pressure. Never wipe a dry lens: dampen the cloth slightly first so it glides rather than drags.
How often should you replace a cover lens? Whenever spatter, scratches, or haze noticeably affect your view of the puddle. In heavy production, that can mean daily replacement. Most helmet manufacturers sell cover lenses in packs of five to ten for this reason.
Can you polish out a hazy welding lens? For the cover lens, a fine plastic polish can improve clarity slightly on lightly hazed surfaces. For heavy contamination or scratching, replacement is faster and more reliable. Never use abrasive polish on the ADF.
What causes a welding lens to get hazy? Arc spatter deposits, metal fume condensation, shop dust, and contact with oily surfaces are the main causes. A heavily used cover lens will haze progressively even with regular cleaning, which is why replacement is the intended maintenance cycle.
References
- American National Standards Institute (ANSI) Z87.1, eye and face protection standard
- Occupational Safety and Health Administration (OSHA), welding eye protection guidelines
- Lincoln Electric, welding helmet lens care documentation
- 3M, Speedglas welding helmet care and maintenance guidelines