Miller Digital Elite Not Darkening: Troubleshooting Guide
You pull the trigger, the arc strikes, and the lens stays light. That fraction of a second feels like an eternity when you are staring into a welding arc without protection. The Miller Digital Elite is one of the most reliable auto-darkening helmets on the market, but every ADF helmet can develop darkening issues - and most of them are fixable without sending the helmet anywhere or buying a new one. This guide works through the causes systematically, from the most common to the least common, so you can diagnose and fix the problem.
Before Anything Else: Confirm the Helmet Is On
This sounds obvious, but it is the first thing to check. The Digital Elite enters a sleep mode after roughly one hour of no arc activity to conserve battery life. Press the mode button to wake it. If the LCD display shows shade numbers and mode text, the helmet is powered and the ADF is active. If the display shows nothing, the battery is the issue - skip to the battery section immediately.
Step 1: Replace the Batteries
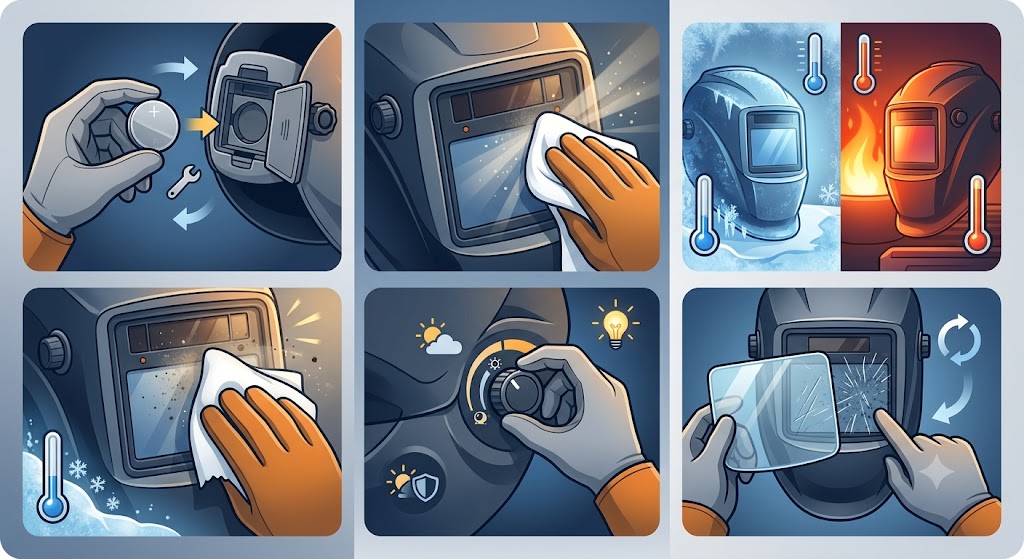
Dead or weak batteries are the single most common cause of Digital Elite darkening failure. The helmet uses two CR2450 3V lithium coin-cell batteries (part number 217043). Even if the display powers on with weak batteries, the ADF cartridge may not have enough voltage to reliably trigger the liquid crystal darkening reaction.
Batteries are cheap. If you have not replaced them in more than a year of regular use, replace them before troubleshooting anything else. Install two fresh 217043 batteries, confirm both are oriented correctly with positive side forward, and retest. This solves the problem a significant percentage of the time.
Step 2: Check the Sensitivity Setting
Sensitivity controls how readily the ADF detects an arc and triggers darkening. The Digital Elite has a sensitivity range of 0 to 10 for Weld, Cut, and Grind modes. Setting 0 is least sensitive; setting 10 is most sensitive.
If sensitivity is set too low, the helmet may not detect low-amperage arcs reliably - common in TIG welding at below 30 amps. The manufacturer recommends starting at setting 5 for most applications and adjusting from there. For low-amperage TIG, try 7 to 9. For high-amperage MIG or stick, 3 to 5 usually suffices.
Access sensitivity through the digital controls on the inside of the ADF cartridge. There are LTR (lighter) and DKR (darker) shade adjustment buttons and a mode button. Check your owner’s manual or the Miller website (millerwelds.com) for the specific button sequence to access sensitivity vs. shade adjustment on your generation of Digital Elite.
Step 3: Check the Mode Setting
The Digital Elite has four operating modes: Weld, Cut, Grind, and X-Mode. If the helmet is in Grind mode, it is intentionally locked to shade 3 and will not darken further for an arc - this is by design, so you can see while grinding without the lens triggering. If you accidentally left the helmet in Grind mode and try to weld, it will appear as though the lens is not darkening properly.
Check the mode display and cycle through modes with the mode button until you are in Weld or X-Mode before welding.
Step 4: Clean or Unobstruct the Arc Sensors
The Digital Elite has four arc sensors located at the top of the ADF cartridge. Spatter, grinding dust, paint mist, or even a heavy layer of fresh weld smoke residue can partially coat the sensor windows and reduce their ability to detect the arc.
With the helmet powered off, gently wipe the sensor windows (the small dark or translucent rectangles at the top of the cartridge) with a soft cloth slightly dampened with isopropyl alcohol. Do not use abrasive materials. Dry completely before testing.
Also consider your welding position. If any part of your torch body, your arm, or a workpiece corner is physically blocking the sensors from seeing the arc, they cannot trigger. Reposition the work or your torch angle slightly so at least two sensors have a clear line of sight to the arc.
Step 5: Use X-Mode for Outdoor or Obstruction-Heavy Work
X-Mode is one of the most important features on the Digital Elite and is specifically designed for situations where optical sensors struggle. While standard Weld mode uses the light flash of the arc to trigger darkening, X-Mode uses electromagnetic detection of weld current. When the welding machine delivers current through the work circuit, the Digital Elite detects the electromagnetic field and darkens - before the arc even fully strikes.
X-Mode is the correct mode for:
- Outdoor welding in bright sunlight (which can confuse optical sensors)
- Welding in positions where sensors may be partially blocked by your body or the joint geometry
- Low-amperage TIG where the arc light flash is subtle
- Any environment where the optical sensors are getting triggered by ambient light but not reliably by the arc
Important note on X-Mode: In X-Mode, sensitivity is fixed at 0 and is not user-adjustable. The electromagnetic detection method is either present or it is not - you cannot dial it in. Also, X-Mode will darken when you run an angle grinder nearby since the grinder motor produces an electromagnetic field. Stay at least 12 feet from other welding activity when using X-Mode to avoid false triggers.
Step 6: Check the Solar Panels
The Digital Elite has solar assist panels on the front of the ADF cartridge. While the primary power source is the CR2450 batteries, heavily contaminated or covered solar panels can contribute to insufficient operating voltage under bright arc conditions, particularly when the batteries are aging.
Inspect the solar panels (the small dark strips flanking the lens area on the cartridge front). They should be clean and unobstructed. If they are coated with paint, scale, or heavy spatter, clean them gently with a soft cloth.
Step 7: Inspect the ADF Cartridge for Damage
If all the above steps fail to resolve the darkening issue, the ADF cartridge itself may be damaged. The most common cartridge failures are:
- Cracked LCD panel from a dropped helmet - visible as a discolored or hazy region across the lens
- Failed liquid crystal cell from extreme temperature exposure - the lens may appear to darken unevenly or not at all
- Water intrusion from heavy condensation or an outdoor rain event - can cause erratic darkening
A cartridge that has visible damage or behaves erratically after all troubleshooting steps is at the end of its service life. Miller auto-darkening lens cartridges are warranted for three years from purchase date; if you are within that window and the failure is not from obvious physical damage, contact Miller or the point of purchase.
Step 8: Check the Delay Setting
An often-overlooked cause of apparent “not darkening” complaints is actually a very short delay setting combined with looking at the already-darkened lens after the arc is out. The delay controls how long the lens stays dark after the arc stops. If delay is set to minimum (fastest), the lens returns to light state almost immediately when you stop welding, which is correct behavior - not a malfunction.
Conversely, if delay is set very long, the lens will appear dark even after welding stops, which can feel like it is not clearing. Neither of these is a fault - both are expected behavior from the delay control. Set delay to a mid-range position (around 0.5 seconds) for most welding and verify you are seeing consistent darkening during the weld.
Summary Checklist
| Step | Check | Fix |
|---|---|---|
| 1 | Power and display | Wake from sleep; replace 217043 batteries |
| 2 | Sensitivity too low | Increase to 5-7 for most processes |
| 3 | Wrong mode | Switch from Grind mode to Weld or X-Mode |
| 4 | Sensors obstructed or dirty | Clean sensors; adjust torch angle |
| 5 | Outdoor/bright ambient light | Switch to X-Mode |
| 6 | Solar panels dirty | Clean solar panels |
| 7 | Cartridge damage | Inspect visually; warranty claim if within 3 years |
| 8 | Delay/shade settings off | Reset to mid-range delay and appropriate shade |
Frequently Asked Questions
Why does my Digital Elite darken when I grind but not when I weld? Grinding sparks produce a visible light flash that optical sensors detect. If the helmet darkens for grinding but not welding, the arc during welding may be too low-amperage for the current sensitivity setting. Increase sensitivity and try X-Mode.
Does X-Mode replace Weld mode completely? For most welding scenarios, yes. The electromagnetic detection in X-Mode is typically more reliable than optical-only detection. The limitation is that nearby electromagnetic sources (other welders within 12 feet, angle grinders) can cause false triggers.
My Digital Elite flickers in and out of dark while welding. What causes this? Most commonly: partially discharged batteries, sensitivity set too low for the amperage being used, or a sensor intermittently losing line-of-sight to the arc. Replace batteries first, then increase sensitivity, then check torch angle relative to the sensors.
Can I weld without the cover lenses installed? No. Welding without cover lenses will expose the ADF cartridge to direct spatter and voids the warranty. It also causes lens scratching that degrades visibility permanently.
My helmet was in storage for two years and now won’t darken. What happened? The CR2450 batteries self-discharge over time even unused. After two years, they are likely depleted. Replace both with fresh 217043 batteries.
At what shade should I set my Digital Elite for MIG welding? For most MIG welding at 100-250 amps, shade 10 to 11 is typical. The Digital Elite allows shade 8-13 in Weld mode. Start at shade 10 and adjust lighter or darker based on comfort and arc visibility.
Keywords: miller digital elite not darkening, miller digital elite troubleshooting, X-Mode miller helmet, miller digital elite sensitivity, miller ADF not working