Welding Symbols Chart: Complete Visual Guide
The first time you see a welding blueprint, the little flags and triangles hanging off arrows can look like a secret code. They are not. Welding symbols are a precise shorthand that tells you exactly what weld to make, where, how big, and to what standard, all in a compact mark. Learn the parts once and the whole chart opens up. This visual guide walks through every element of a welding symbol so you can read a drawing with confidence and know what the shop expects.
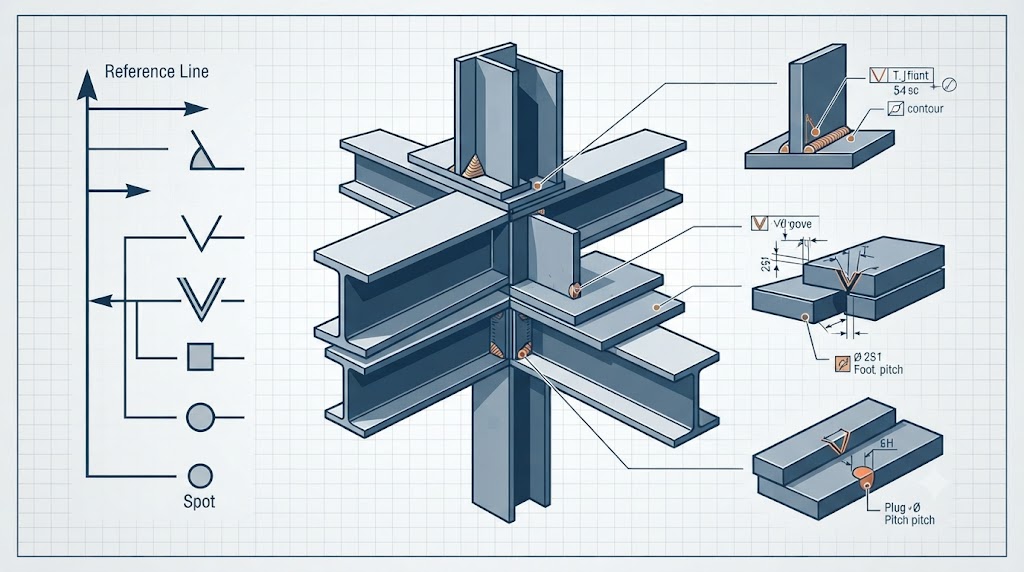
A welding symbol is a standardized graphic, defined by AWS A2.4, that communicates the type, size, location, and details of a weld on an engineering drawing. It is built from a reference line, an arrow, and weld symbols placed in specific positions. Here is the complete breakdown.
The parts of a welding symbol
Every welding symbol is assembled from a common set of elements:
- The reference line, the horizontal line that everything attaches to.
- The arrow, which points from the reference line to the joint being welded.
- The weld symbol, a small shape showing the weld type (fillet, groove, and so on).
- Dimensions, the size, length, and spacing placed around the weld symbol.
- Supplementary symbols, like weld-all-around and field-weld marks.
- The tail, which carries the process, specification, or other notes.
Understanding where each piece sits, and what its position means, is the key to reading the whole chart.
Direct answer: how to read a welding symbol
To read any welding symbol, work through it in order:
- Find the arrow and follow it to the joint it points to (this is the “arrow side”).
- Read the reference line, checking whether the weld symbol is below it or above it.
- Identify the weld symbol to know the weld type.
- Read the dimensions around it for size, length, and spacing.
- Check for supplementary symbols at the junction (weld all around, field weld).
- Read the tail for the process or specification.
The below/above rule is the one to memorize: below the reference line means the arrow side, above means the other side.
Arrow side versus other side
This is the concept everything else hangs on. The arrow points to a specific joint, and the side of the joint the arrow touches is the “arrow side.” The opposite face is the “other side.” Now the crucial part: a weld symbol placed below the reference line means the weld goes on the arrow side, and a weld symbol placed above the reference line means the weld goes on the other side. If symbols appear both below and above, you weld both sides. The reference line itself is always drawn horizontal regardless of how the arrow is angled, so orientation of the reference line never changes the meaning, only the position of the symbol relative to it does. Get this rule down and most of a drawing falls into place.
Weld type symbols
The small shape on the reference line tells you the weld type, and each has its own mark:
- Fillet weld: a right triangle, for joints roughly at right angles (T-joints, laps, corners).
- Groove welds: a family of shapes for welds in a prepared joint, including square, V, bevel, U, and J grooves.
- Plug and slot welds: for filling a hole or slot in one member.
- Surfacing weld: for building up a surface.
Each weld symbol has its own dimensions and placement rules, covered in the dedicated guides for fillet, groove, plug and slot, butt, and tack and stitch welds. On the chart, learn to recognize the shape first, then read its dimensions.
Supplementary symbols
Beyond the weld type, a few extra marks add important instructions. An open circle at the junction where the arrow meets the reference line means weld all around, telling you to carry the weld completely around the joint. A filled (darkened) flag at that same junction means field weld, indicating the weld is made in the field or at erection rather than in the shop. Contour symbols (flush or convex) sit on the weld symbol to show the finished shape of the weld face. And the tail, an open fork at the far end of the reference line, holds supplementary information such as the welding process, the electrode or filler specification, or a reference to a procedure. If there is nothing to note there, the tail is simply left off.
The governing standard
Welding symbols in North America are standardized by AWS A2.4, Standard Symbols for Welding, Brazing, and Nondestructive Examination, which defines exactly how each element is drawn and placed. Because it is a standard, a symbol means the same thing on any drawing that follows it, which is the entire point: a welder in one shop can read a drawing made in another and build the right weld. The standard is periodically updated, so details evolve between editions, and internationally the ISO 2553 system covers similar ground with some differences in layout. When a drawing cites a standard in its notes or title block, that tells you which symbol rules apply.
The bottom line
A welding symbol is not a mystery once you know its parts: a reference line, an arrow pointing to the joint, a weld symbol showing the type, dimensions for size and spacing, supplementary marks for weld-all-around and field welds, and a tail for the process or spec. The single most important rule is position: a weld symbol below the reference line means the arrow side, above means the other side, and both means both sides. Learn to work through a symbol in order, arrow first, then the below/above position, then the weld type and dimensions, and any blueprint becomes readable. From here, the dedicated guides on fillet, groove, plug, slot, butt, and stitch welds fill in each weld type’s own details.
FAQ
What is a welding symbol? A welding symbol is a standardized graphic on an engineering drawing that communicates the type, size, location, and details of a weld. Defined by AWS A2.4, it is built from a reference line, an arrow pointing to the joint, a weld symbol, dimensions, and optional supplementary marks and a tail for notes.
What does above or below the reference line mean? Position tells you which side of the joint to weld. A weld symbol below the reference line means the weld goes on the arrow side, the side the arrow points to. A weld symbol above the reference line means the other side. Symbols both below and above mean you weld both sides.
What is the arrow side versus the other side? The arrow points to a specific joint, and the face it touches is the arrow side; the opposite face is the other side. This pairing works with the below/above rule: below the reference line refers to the arrow side, above refers to the other side.
What does a circle on a welding symbol mean? An open circle at the junction where the arrow meets the reference line means weld all around, instructing you to carry the weld completely around the joint. It is one of the supplementary symbols, along with the field-weld flag, that add instructions beyond the basic weld type.
What is the tail of a welding symbol for? The tail, an open fork at the end of the reference line, carries supplementary information such as the welding process, the electrode or filler specification, or a reference to a welding procedure. If there is no such note to add, the tail is simply left off the symbol.
What standard governs welding symbols? In North America, AWS A2.4, Standard Symbols for Welding, Brazing, and Nondestructive Examination, defines how each element is drawn and placed. Internationally, ISO 2553 covers similar ground with some layout differences. The standard cited in a drawing’s notes tells you which symbol rules apply.
References
- AWS A2.4, Standard Symbols for Welding, Brazing, and Nondestructive Examination (industry standard), aws.org.
- Miller Electric and Lincoln Electric guides to reading welding symbols and blueprints (manufacturers), millerwelds.com, lincolnelectric.com.
- The National Board and industry references on weld symbol interpretation (industry reference), nationalboard.org.