DIY Welding Table Build Guide
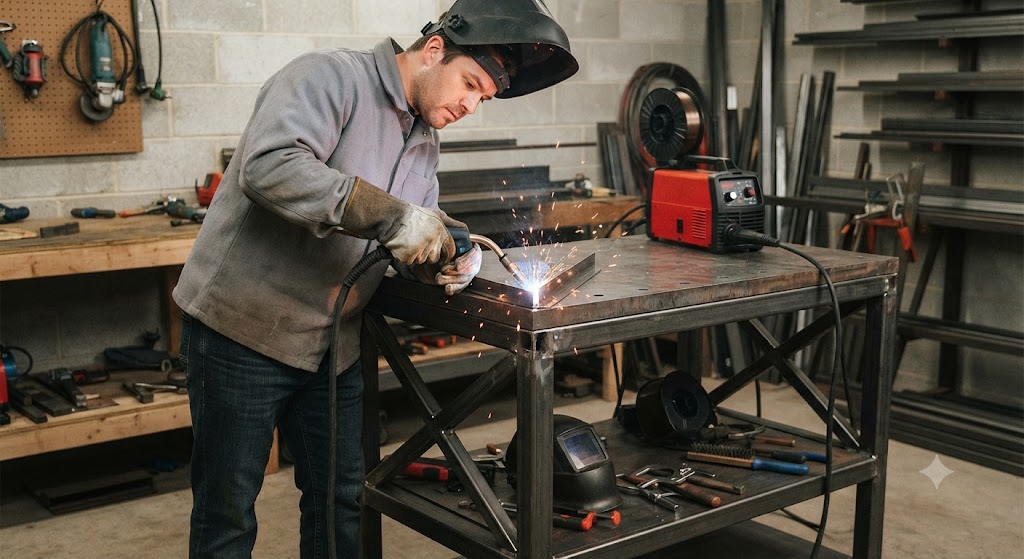
There is a rite of passage in metalworking: the first real project you build for yourself is usually a welding table. It makes sense. You need a flat steel surface to weld on, and what better way to practice than building the very thing you will use for every project after? A shop-made table also lets you get exactly the size, height, and features you want, built as heavy as you like. Here is how to plan and build one that will serve you for years.
A DIY welding table is built from a steel top (ideally 1/4 inch plate or thicker) on a frame of steel angle iron or square tube, sized to your space, with a flat, level surface and a solid ground path. Here is how to design it, what materials to use, and the build steps.
Why build your own
Building your own table has real advantages beyond the satisfaction:
- Custom size and height, so the table fits your space and your stature, reducing back strain.
- Heavier build than many finished tables, since you choose a thick top and stout frame.
- Great practice, because the build itself sharpens your cutting, fitting, and welding.
- Features you actually want, like a shelf, casters, a vise mount, or fixturing holes.
For many welders, the table is both a useful tool and a proving-ground project. If you would rather not build, a finished table is a fine option (noted at the end).
Direct answer: what makes a good welding table
Whatever the design, a good welding table hits these marks:
- A thick steel top, ideally 1/4 inch plate or thicker, so it stays flat under heat and heavy work.
- A sturdy steel frame of angle iron or square tube that resists racking and wobble.
- A flat, level surface, the single most important quality for accurate work.
- A comfortable working height, commonly around 34 to 36 inches, tuned to you.
- A solid ground path, since an all-steel table lets you clamp your work lead anywhere.
Build to those principles and the details (size, shelves, casters) are yours to customize.
Materials and design
Start by choosing your materials to match how hard you will use the table:
- Top: 1/4 inch steel plate is a common, sturdy choice; 3/8 or 1/2 inch is even flatter and more stable for heavy work. A thicker top resists warping from welding heat and clamping force.
- Frame: steel angle iron or square tube (for example 2 inch square tube) makes a stout, rigid base. Square tube resists twisting well.
- Legs: match the frame stock; add adjustable feet or levelers to dial in a flat surface on an uneven floor.
- Size: a common shop size is around 2 by 4 feet, but scale it to your space and the parts you build.
Sketch the design first, including height and any shelf, so your cut list is accurate before you buy steel.
Build steps
With materials on hand, the build follows a logical order:
- Cut your stock to length for the top, frame rails, and legs, following your cut list. A chop saw or bandsaw gives clean square cuts.
- Build the frame, tacking the rails into a rectangle, checking for square with a framing square, then fully welding once true.
- Attach the legs, clamping them plumb and equal in length, then welding them to the frame. Check that the table does not rock.
- Mount the top, setting the steel plate on the frame, squaring it, and welding or bolting it down. Skip-weld or stitch-weld the top to limit warping from heat.
- Level and finish, adding levelers or feet, grinding welds smooth, and cleaning the top. Leave the top bare steel for grounding, not painted.
Take your time squaring the frame; a table built square and level stays useful for decades.
Tips and things to get right
A few details separate a good table from a frustrating one:
- Control warping on the top by stitch welding rather than laying long continuous beads, which pump in heat.
- Keep the top bare where you ground and work, so you always have a clean electrical path.
- Add fixturing if you want it: drill a grid of holes for clamps and dogs, or leave slots, to hold and square parts.
- Consider mobility: locking casters make the table movable, but fixed legs are more rigid, so choose based on your shop.
- Round or chamfer sharp edges for safety, since you will lean on this table constantly.
These small choices pay off every time you use the table.
If you would rather buy
Building is rewarding, but it is not for everyone, and a finished table saves the time and steel. If you would rather buy:
- Klutch heavy-duty adjustable steel welding table offers a thick top, sturdy frame, adjustable height, and fixturing holes, close to what many people build but ready to use. Its limitation is that it is heavier and less customizable than a table you design yourself.
- Strong Hand Tools Nomad portable welding table is a folding steel table with fixturing slots and adjustable height for those who want portability over a heavy fixed build. The trade-off is a lighter top than a thick DIY plate for the heaviest work.
How to choose: build your own if you want a custom, heavy, project-worthy table and enjoy the work. Buy the Klutch for a sturdy ready-made surface, or the Strong Hand Nomad if portability matters more than mass.
The bottom line
A DIY welding table comes down to a thick steel top (1/4 inch plate or more) on a stout angle-iron or square-tube frame, built flat, level, and at a height that suits you, with a bare-steel surface for grounding. Sketch the design, cut an accurate list, weld the frame square, attach plumb legs, stitch-weld the top to limit warping, then level and finish. Add fixturing holes, a shelf, or casters to taste. Build it well and it becomes the foundation for every project after, or buy a Klutch or Strong Hand Nomad if you would rather skip the build.
FAQ
How thick should a DIY welding table top be? Aim for at least 1/4 inch steel plate, with 3/8 or 1/2 inch even better for heavy work. A thicker top stays flatter under welding heat and clamping force and resists warping and denting, which is the most important quality in a work surface.
What steel should I use for a welding table frame? Steel angle iron or square tube (such as 2 inch square tube) makes a stout, rigid frame. Square tube resists twisting well. Match the leg stock to the frame and add levelers so you can get a flat, stable surface on an uneven floor.
What height should a welding table be? A common working height is around 34 to 36 inches, but tune it to your stature to reduce back strain. Since you are building it yourself, set the leg length to whatever feels comfortable for how you work.
How do I keep the top from warping when welding it on? Use stitch or skip welds rather than long continuous beads, which pump in heat and cause warping. Weld in a balanced sequence, let the metal cool between passes, and clamp the top flat to the frame while you weld.
Should I paint a welding table? Leave the working and grounding surfaces bare steel so you always have a clean electrical path for your ground clamp. You can paint the legs and underside for rust protection, but keep the top and grounding points unpainted.
Should I build or buy a welding table? Building lets you customize the size, height, and features and makes a rewarding project, and you can build it as heavy as you like. Buying saves time and effort. If you want a custom, heavy table and enjoy the work, build; if you want convenience, buy a finished table.
References
- Miller Electric and Lincoln Electric guidance on welding table setup, grounding, and controlling distortion with stitch welding (manufacturers), millerwelds.com, lincolnelectric.com.
- The Fabricator articles on weld distortion control and fixturing surfaces, thefabricator.com.
- American Welding Society guidance on distortion and welding sequence, aws.org.